Let me introduce myself — my name is Anton Abramchenko and I’m a PHP developer with 10 years of experience, the last 4 of which I have devoted to working with Magento 2. Like most of us, I use the Jetbrains PHPStorm development environment and today I would like to learn how you can quickly and freely work with Magento 2 in this IDE. In the article, I am using PhpStorm 2021.3.1 and Magento 2.4.3, which are the latest versions at the time of writing, and the Ubuntu 20.04 operating system.
Base Appearance Configurations
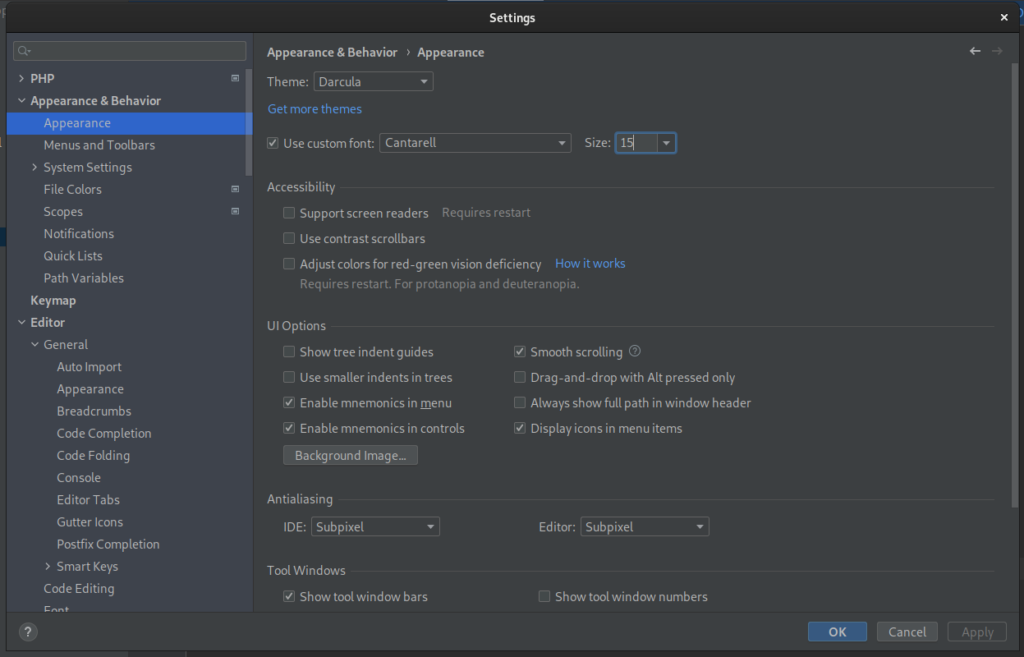
First, let’s take care of our vision.
File -> Settings -> Appearance Behavior -> Appearance
Enable a dark theme for example Darcula or any other alternative of your choice.
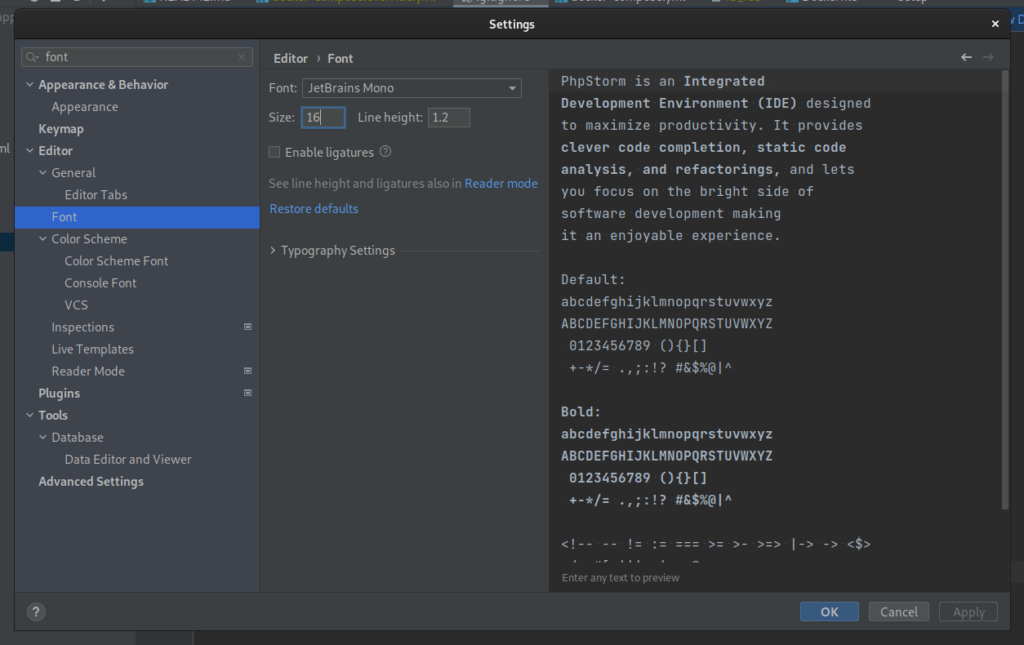
File | Settings | Editor | Font
Increase the font size from 16pt and up.
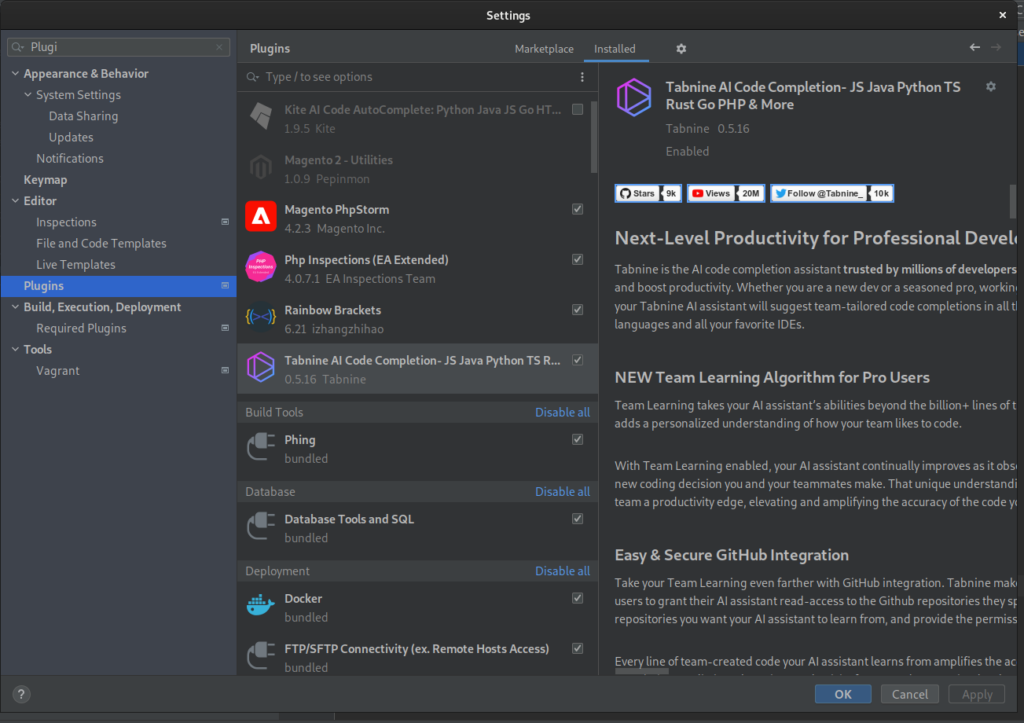
Useful plugins
File | Settings | Plugins
Now we can install all the plugins we need to get started.
I am using the following plugins:
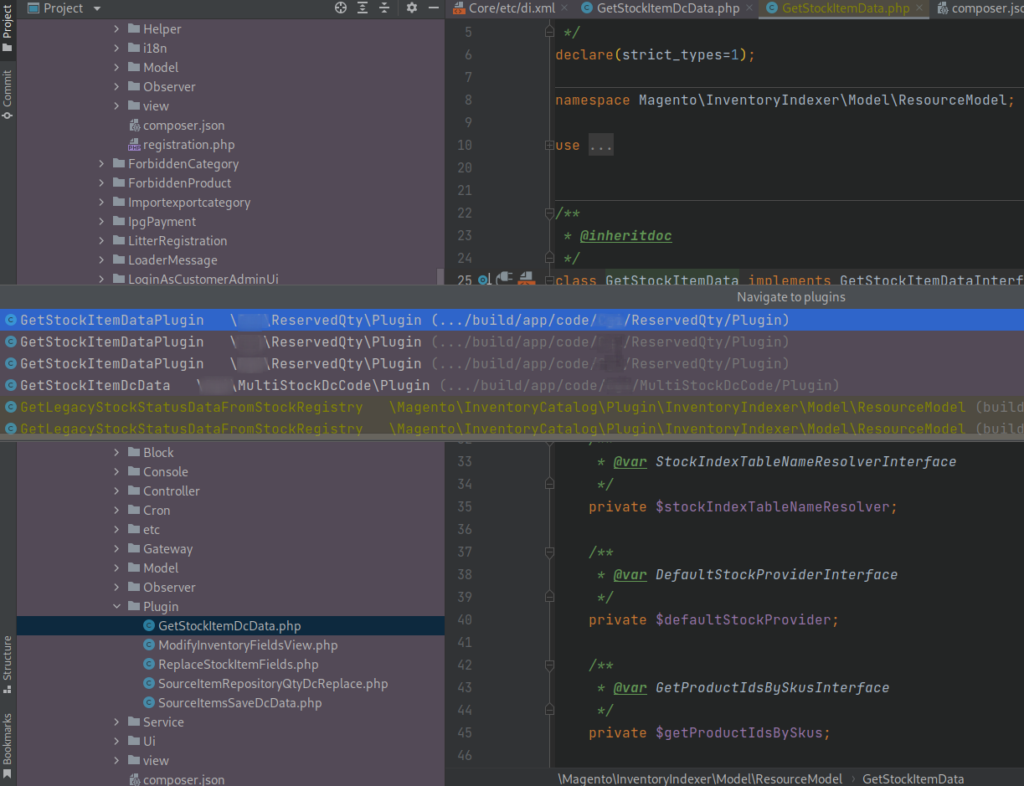
Magento PhpStorm
Magento PhpStorm simplifies work with Magento 2, and extends the IDE functionality with the following:
- Navigate to configuration quick transition to DI for class/interface
- Go to plugin quick transition in DI to the place where the plugin is declared
- Navigate to Web API configuration quick transition to the configuration of the API method.
- Plugin class method generation
- Plugin declaration validation
- Help navigation and RequireJS links
- Help navigation and MFTF links
- Code generation
- XML configuration checks
After installing the plugin, head to File | Settings | PHP | Frameworks
Enable Magento integration.
In the Magento installation path field, enter the full path to your project
Then click “Rreindex” and “Apply”.
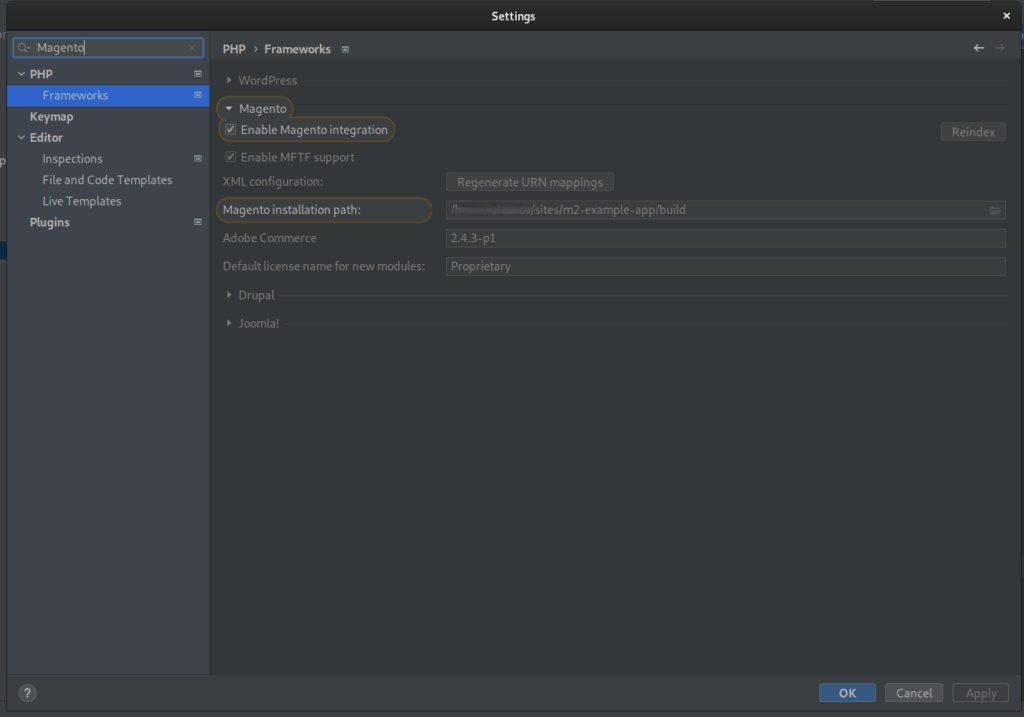
After reindex is complete, the IDE will be updated with new features.

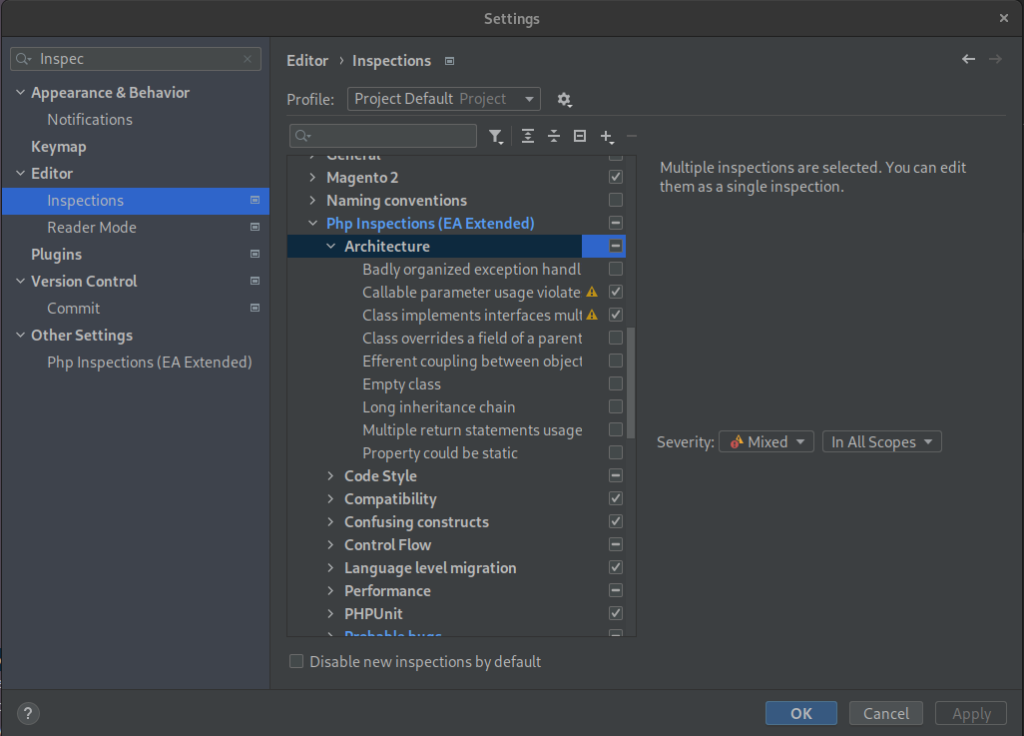
Php Inspections (EA Extended)
Php Inspections extend the level of code inspection and include
- architecture related issues
- performance issues
- suboptimal, repetitive, and suspicious “if” conditions
- checking the use of magic methods
- regular expressions
- compatibility issues
- using PHPUnit API
- security issues
Head to File | Settings | Editor | Inspections
For changing the code inspection settings.
Rainbow Brackets
Colors brackets in different colors, which improves the readability of the code.
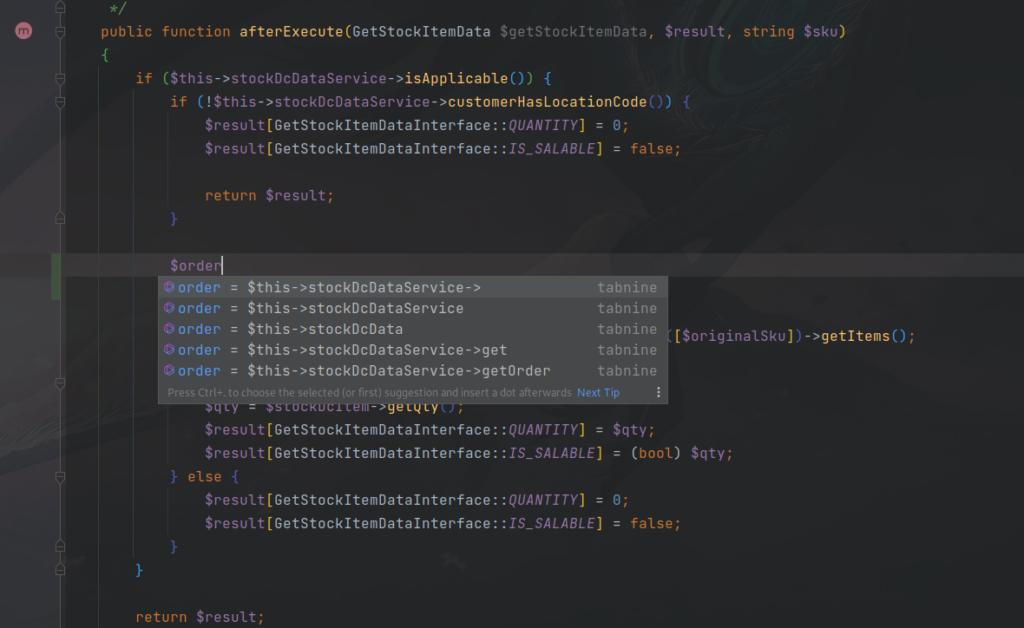
Tabnine AI Code Completion
Artificial intelligence that learns auto-completion from your code and the code of your colleagues.
Develop with Docker
Set up the ability to use Docker from the IDE.
File | Settings | Build, Execution, Deployment | Docker
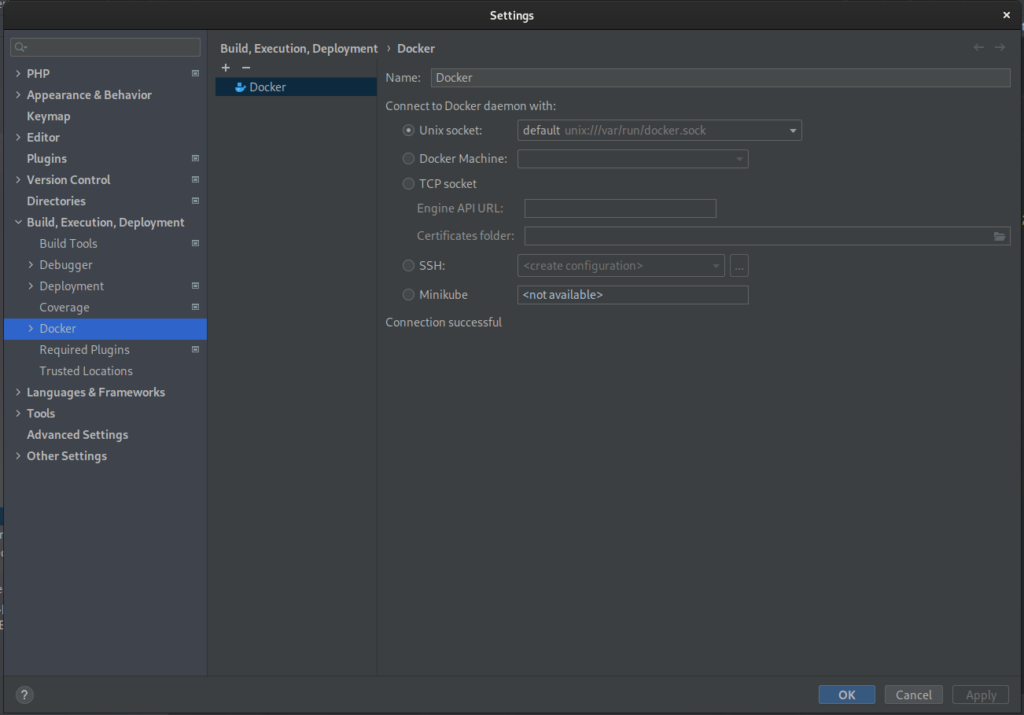
We will be looking at Docker configuration on Linux OS.
If you want to install Docker on a different operating system or you want to learn more about PhpStorm’s Docker features
follow this link.
For Linux, just select the Unix Socket in “Connect Docker daemon with” and click the “Apply” button.
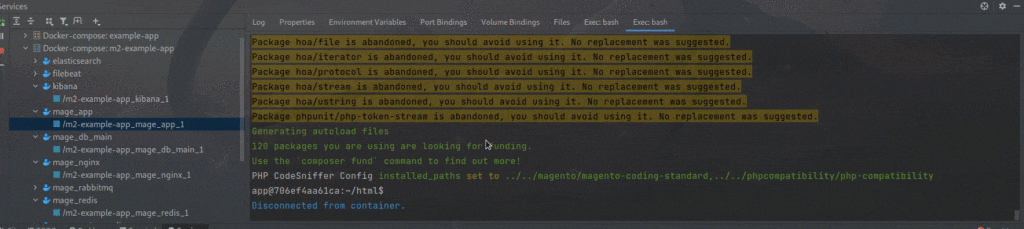
Now when we click on “Services”, we can work with Docker.
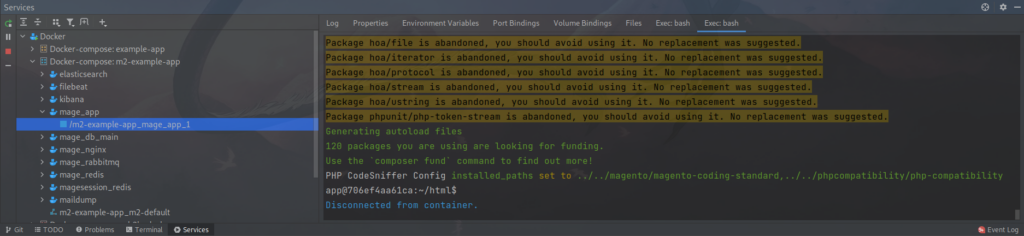
For example, we can look at the output of each container.
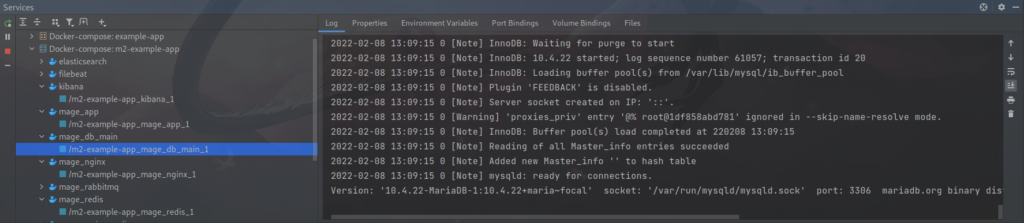
Or connect to the container and manage the data from within.
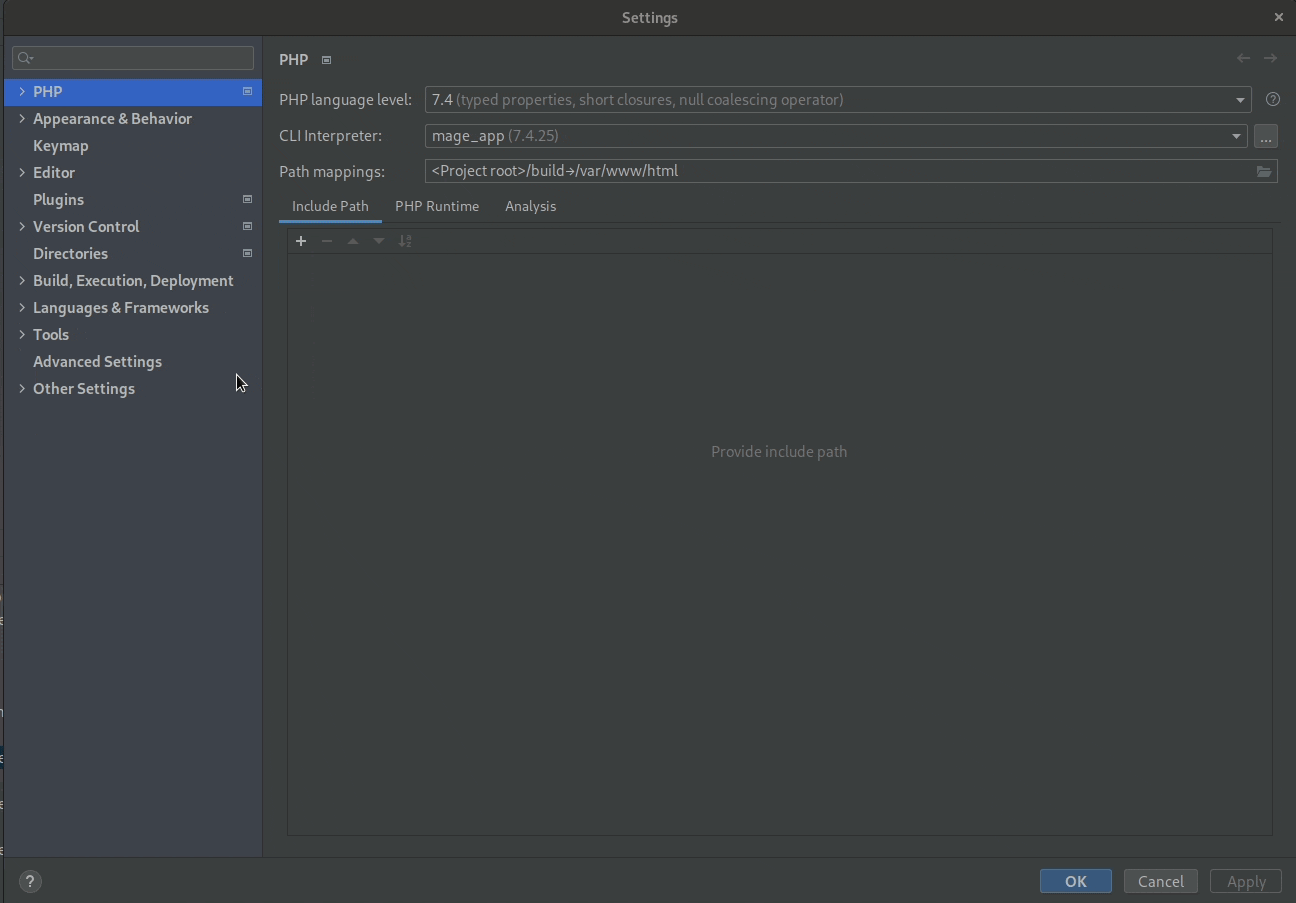
Set up the interpreter File | Settings | PHP

To work with the PHP interpreter from a Docker container, you need to configure the CLI Interpreter and Path mapping.
Split project by scopes
Now let’s set up the scopes of the IDE (scopes).
The scope is a set of files to which various operations and settings are applied, it is also possible to highlight these files using color in all PhpStorm windows. You can see the full description here
In order to set scopes go to:
File | Settings | Appearance & Behavior | Scopes
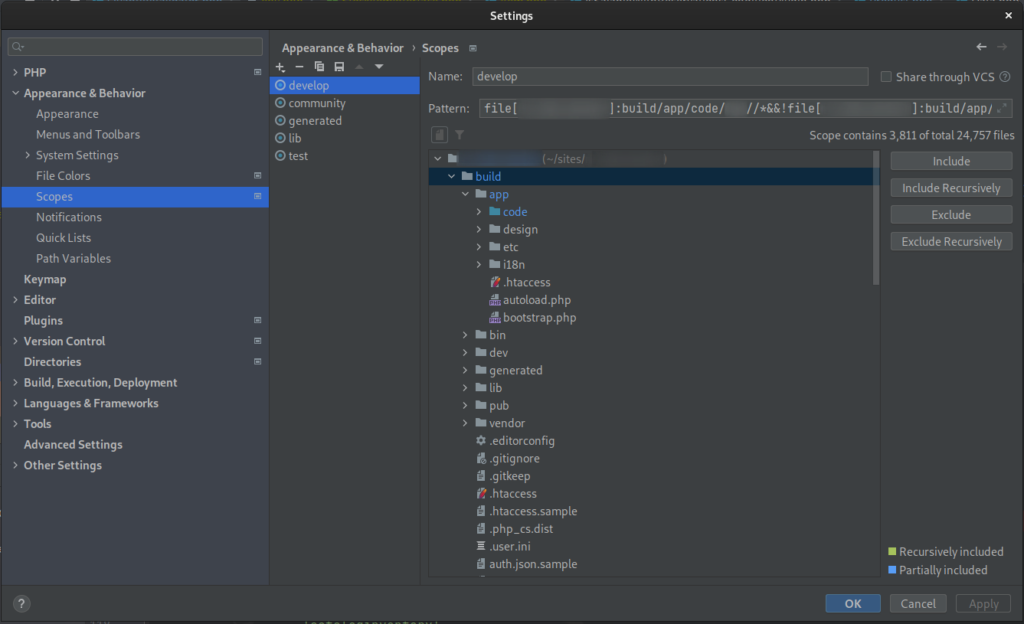
I usually create 5 scopes:
develop – file[project_name]:build/app/code/VendorName//
community – file[project_name]:build/app/code/CommunityVendorName//
generated – file[project_name]:build/generated//
lib – file[project_name]:build/lib//
After we have created scopes, let’s highlight them
File | Settings | Appearance & Behavior | File Colors
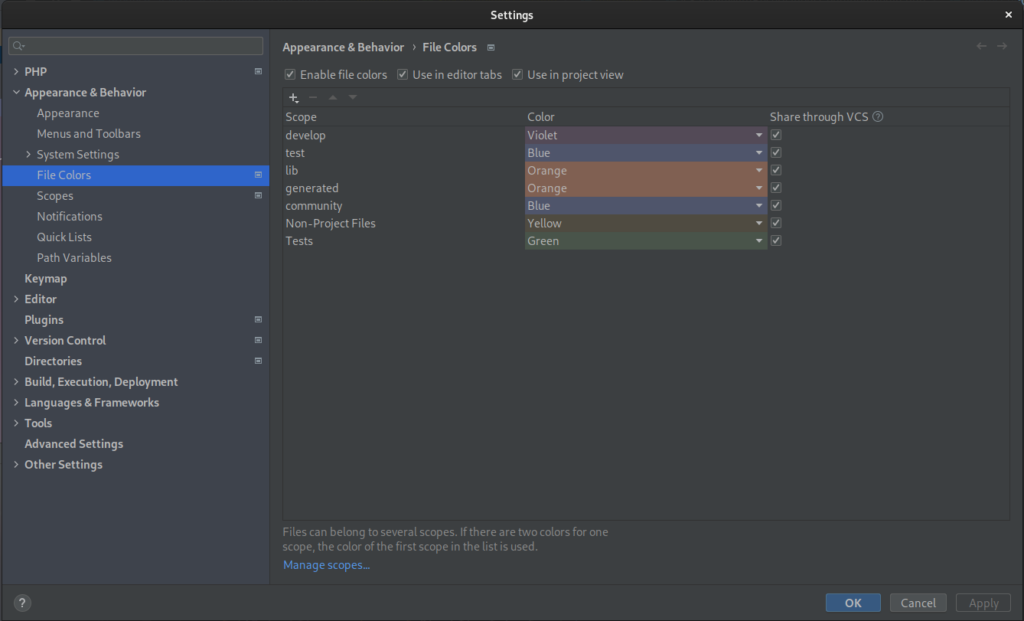
As a result, this will easily help you navigate the code, immediately see your and third-party, generated files in the stack trace, and search for files.
Directories Index
We will also set up directory indexing.
Let’s exclude all auxiliary directories from the index to speed up our IDE. We also mark the Sources and Resource Root directories.
File | Settings | Directories
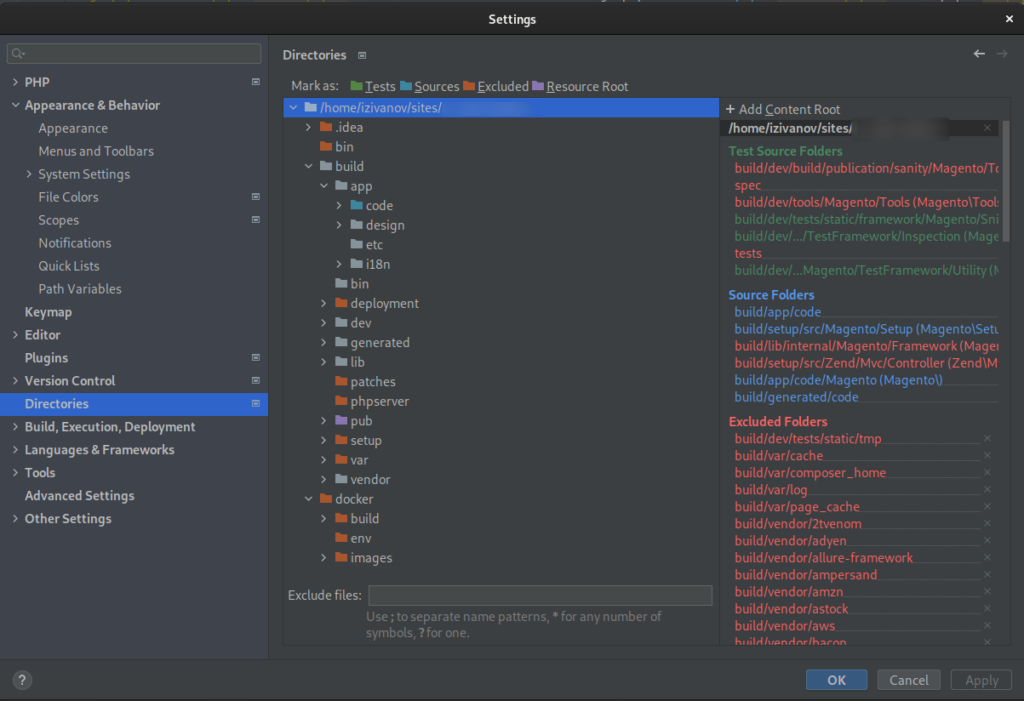
Also, use the “Exclude files” field to exclude files by regular expression.For instance
.log;.txt;*Test.php; *.ts,!*.spec.ts
This pattern will remove from the index all .log, .text files, as well as all php test files whose name ends with Test.php
And it will also exclude all .spect.ts files from the index and leave .ts in the index
You can find more information about Directories here.
Docker-compose template
Now let’s take a closer look at the directory structure on the top level there are three folders:
bin – bash scripts for convenient work with the ecosystem of Docker containers, deploying and updating the environment.
docker – everything you need to locally build a project based on docker-compose.
build – Magento 2.4.3 project.
docker-compose.yml – environment configuration and initialization file.
docker-compose.override.template.yml – file for redefining environment configurations.
README.md – detailed description of the environment and its deployment
The build folders and the parent folder are two separate git repositories. The build folder is excluded from the parent repository in .gitignore
File | Settings | Version Control | Directory Mappings
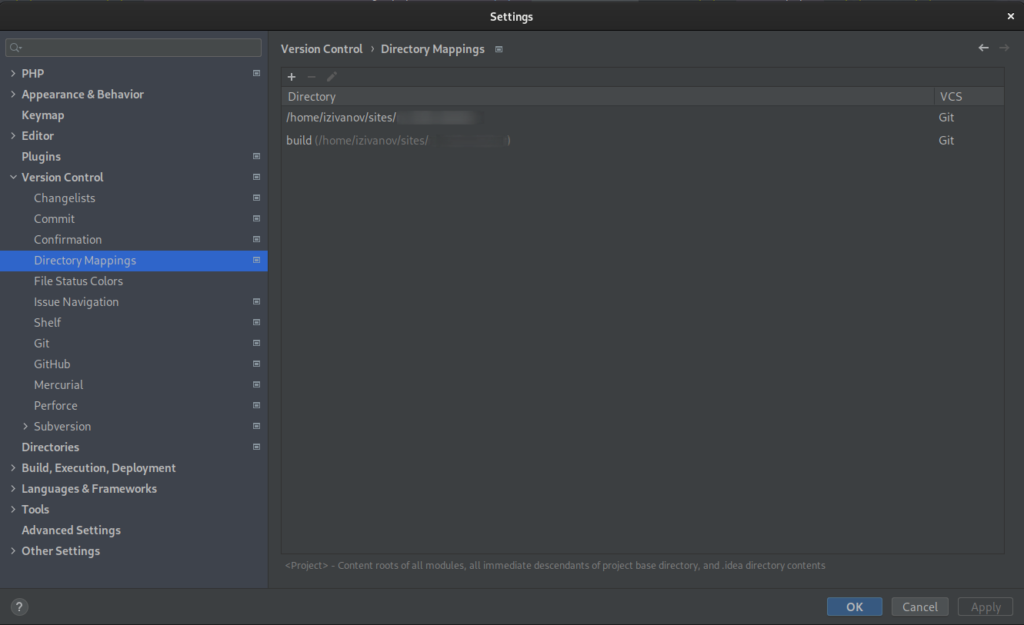
This separation of project and environment allows you to extend them independently and reuse the environment for other projects. The environment build (docker-compose template) includes docker images with the following software:
Database: MariaDB 10.4
Web server: Nginx 1.18
PHP 7.4 (FPM)
Redis 6.0 (for cache and session storage)
RabbitMQ 3.8
Maildump (for mail catch)
Elasticsearch 7.3.1 (for full-text search)
Kibana 7.3.1 (Elasticsearch GUI)
Filebit 7.3.1 (Logs harvester)
If you are interested, we can consider this assembly in detail in a separate article. Now it is important that it includes everything you need for comfortable work with Magento 2. Also, pay attention to the following popular builds.
https://github.com/markshust/docker-magento
https://github.com/meanbee/docker-magento2
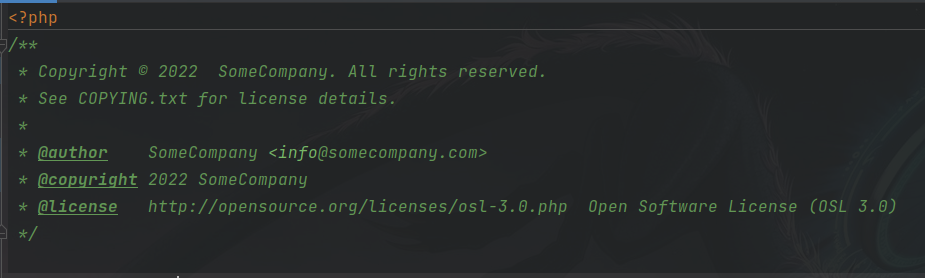
Copyright Profile Configurations
Now let’s set the copyright for the project files, each new file will be created with the copyright of your company.
Let’s create a profile.
File | Settings | Editor | Copyright | Copyright Profiles
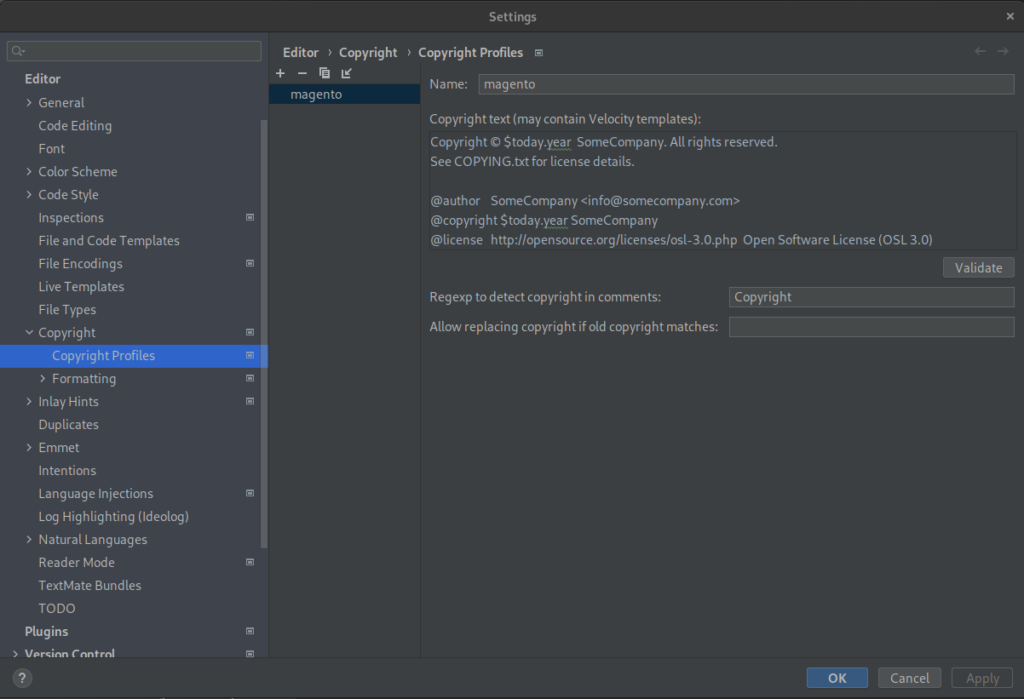
And set up the format for PHP files, I use the following configuration.
File | Settings | Editor | Copyright | Formatting | PHP
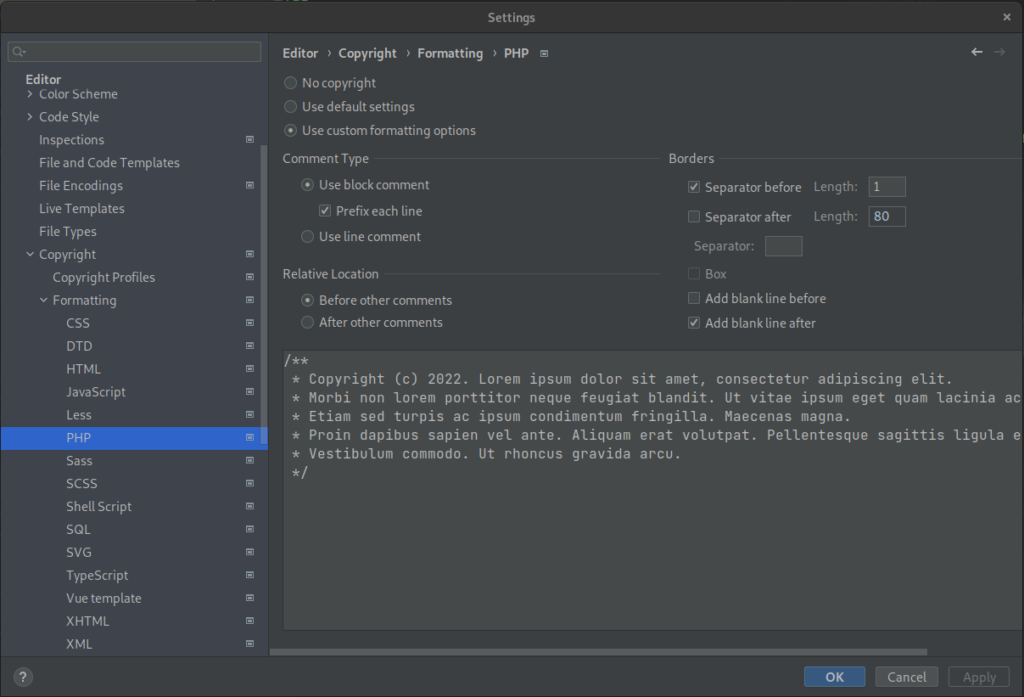
And apply copyright to all project scopes.
File | Settings | Editor | Copyright

As a result, each PHP file we create will have a copyright of this kind.
In copyright, you can use variables and many other constructs from Velocity template.
For example, $today.year to display the current year.
Follow the link to learn more about PhpStorm’s copyright features.
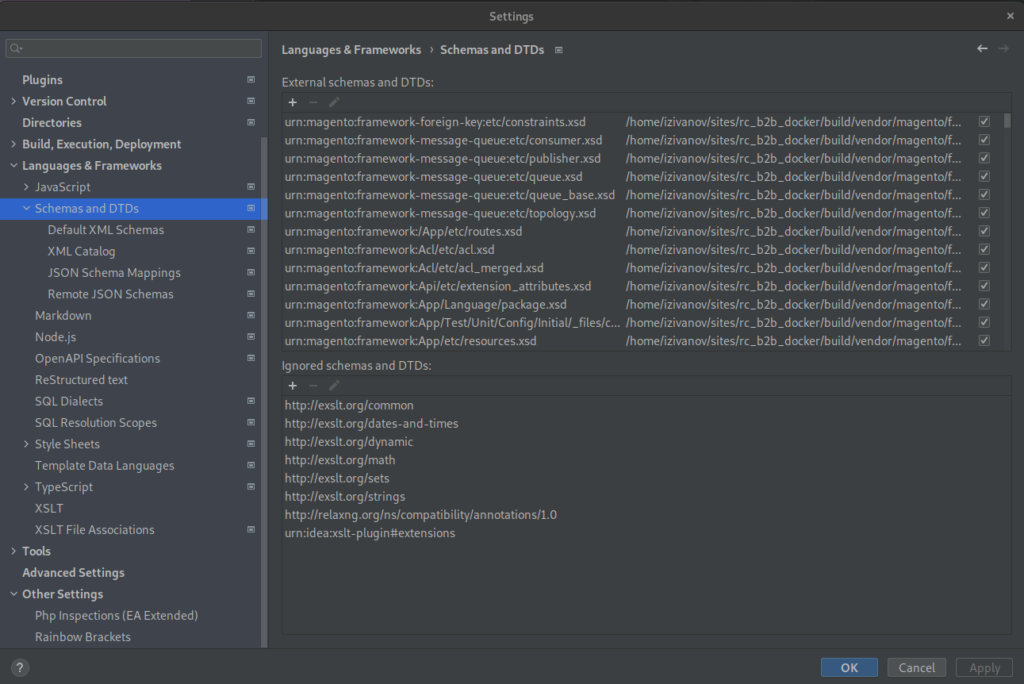
Uniform Resource Names (URNs)
Now let’s set up auto-completion and validation in xml files.
Open a terminal and generate Uniform Resource Names (URNs)
Open the project folder and run the following command:
bin/magento dev:urn-catalog:generate misc.xml
And now copy misc.xml to the folder .idea at the root of your PHPStorm project.
To see which URNs have been created go to:
File | Settings | Languages & Frameworks | Schemas and DTDs
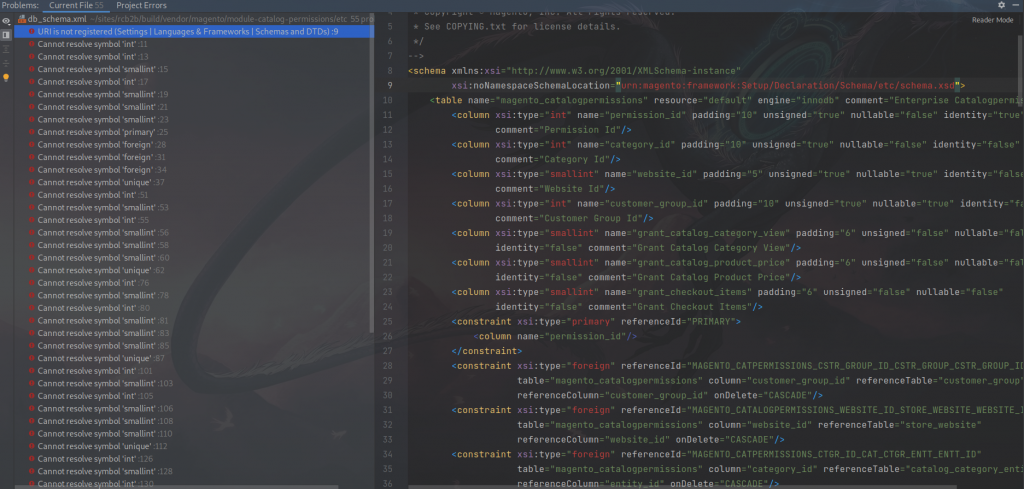
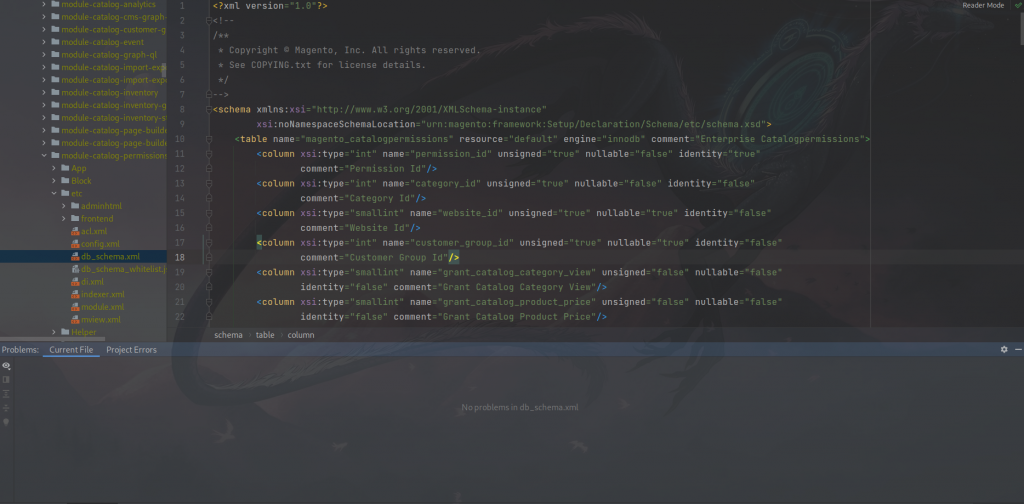
Now let’s see how db_schema.xml looked before and after setting up the URN
Inspection and Static Code Analysis Tools
Now it’s time to set up Inspections
Magento 2 Coding Standards are already in the folder vendor
Let’s head to File | Settings | PHP | Quality Tools to specify an interpreter for PHP_CodeSniffer, Mess Detector, and other static code analyzers. Since we are using Docker, we will be using the PHP interpreter located in the mage_app container.
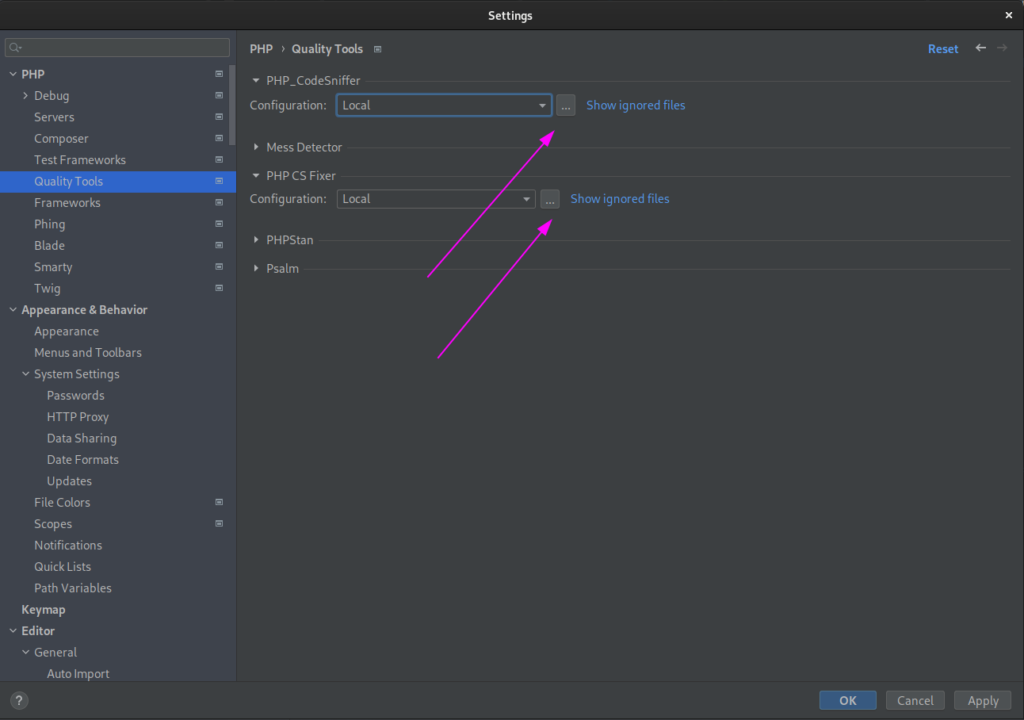
Click on the button … in the window Settings
In the opened PHP_CodeSniffer window click on the “+” button to create or select an existing CLI Interpreters.
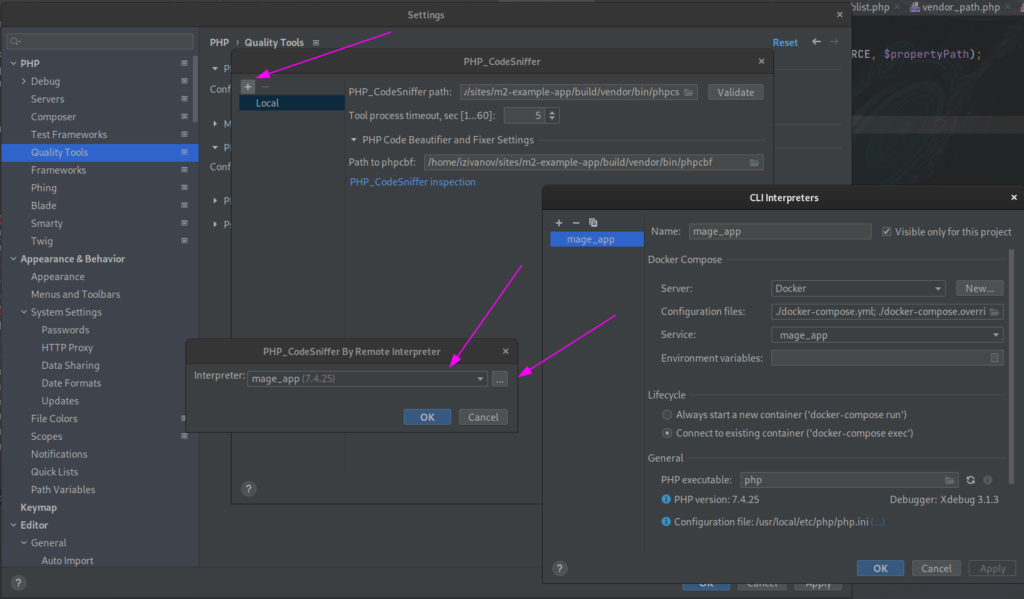
Select the mage_app interpreter and set the paths if they are not set.
PHP_CodeSniffer path:
/var/www/html/vendor/bin/phpcs
Path to phpcbf:
/var/www/html/vendor/bin/phpcbf
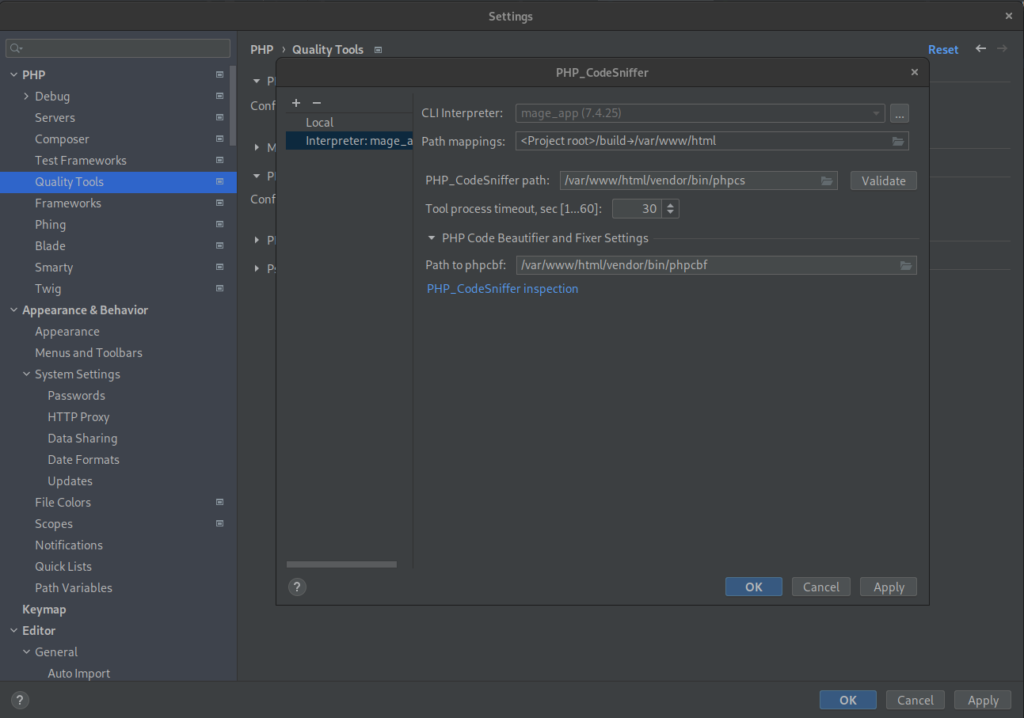
Just like the PHP_CodeSniffer interpreter, we can customize:
PHP Mess Detector path:
/var/www/html/vendor/bin/phpmd
PHPStan path:
/var/www/html/vendor/bin/phpstan
PHP CS Fixer path:
/var/www/html/vendor/bin/php-cs-fixer
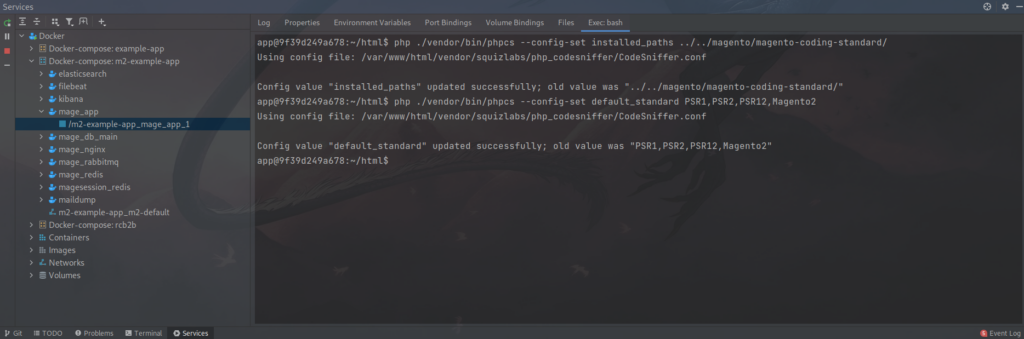
Now let’s connect Magento 2 codding standards to our IDE.
Open a terminal and run inside a container:
php ./vendor/bin/phpcs –config-set installed_paths ../../magento/magento-coding-standard/
php ./vendor/bin/phpcs –config-set default_standard PSR1,PSR2,PSR12,Magento2
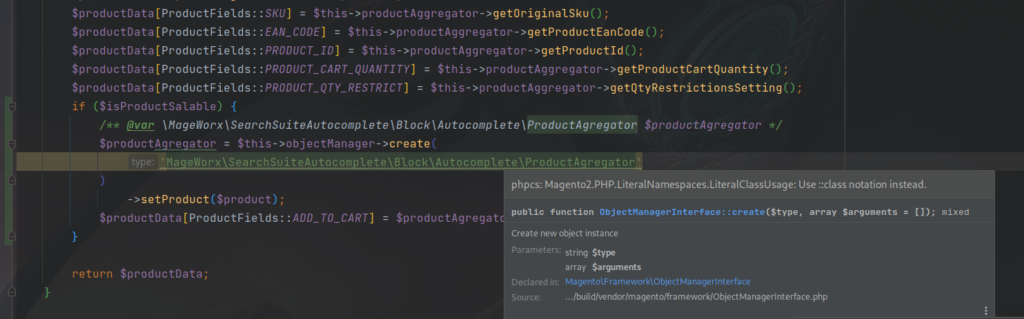
Now let’s set up the inspection in IDE File | Settings | Editor | Inspections
Put a tick next to PHP_CodeSniffer validation
In the coding_standard field, select Magento 2
In the Serverity field, select Warning
And press the “Apply” button

As a result, our IDE will validate our code, report possible errors and problems, and recommend solutions.
We can set up other static code analyzers in a similar way.
Code Inspections improve the quality of development, as it draws the developer’s attention to possible or typical errors and forces them to use the best practices created by the PHP community while writing code. You can learn more about Code Inspections here.
Xdebug Setup
Now it’s time to set up and turn on our main tool Xdebug
Xdebug must be installed and enabled first.
Also the file php.ini in Docker container, mage_app should contain the following lines:
xdebug.mode=debug
xdebug.start_with_request=trigger
xdebug.discover_client_host = false
xdebug.client_host = 172.17.0.1
xdebug.client_port = 11912
xdebug.log=/var/www/html/xdebug.log
xdebug.max_nesting_level=1000
xdebug.idekey=”PHPSTORM”
Where
xdebug.client_host – The IP of your PC in the Docker network, and it should also be stored in the XDEBUG_CONFIG environment variable
Set up the IDE, go to File | Settings | PHP | Servers
Click on the “+” button
Name – This value must match the value of the PHP_IDE_CONFIG environment variable
Host—localhost.
Port—80.
Debugger—Xdebug.
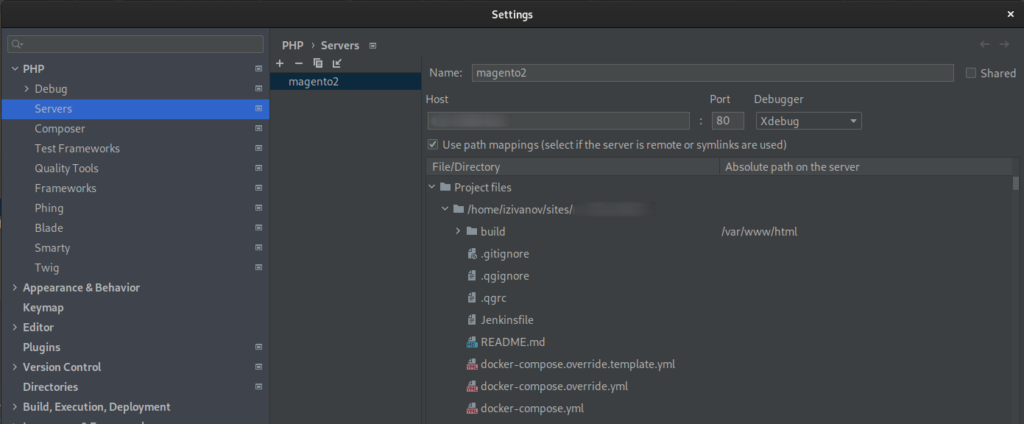
Also set up path mappings.
Path on our PC /home/user/project_name will be equal to the path /var/www/html inside the mage_app container.
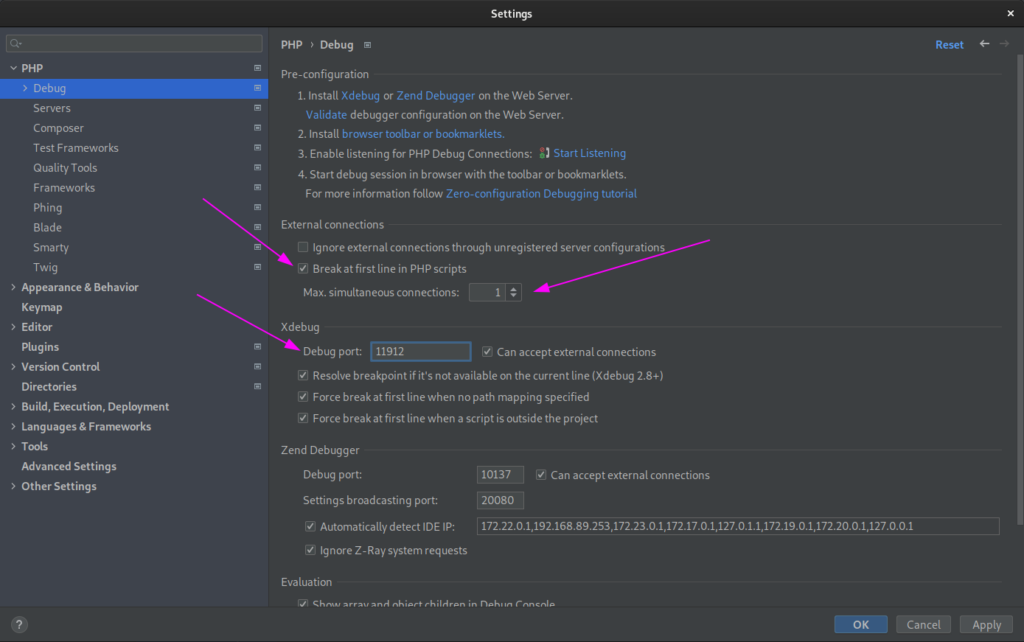
Open File | Settings | PHP | Debug
Put a tick next to “Break at first line in PHP script”
Max. simultaneous connection – 1
Debug port – 11912
Port 11912 can be closed by default in which case it should be opened in IP tables.
iptables -I INPUT -p tcp -m tcp –dport 11912 -j ACCEPT
If you want to set up Xdebug to work with Windows, MacOS, or if you are interested in the details of using xdebug with Vagrant and the difference in xdebug 2.x and 3.x settings, please read the following article.
DB Tools
In order to set up work with the database from PhpStorm let’s head to View | Tool
Windows | Database, and click on the “+” icon.
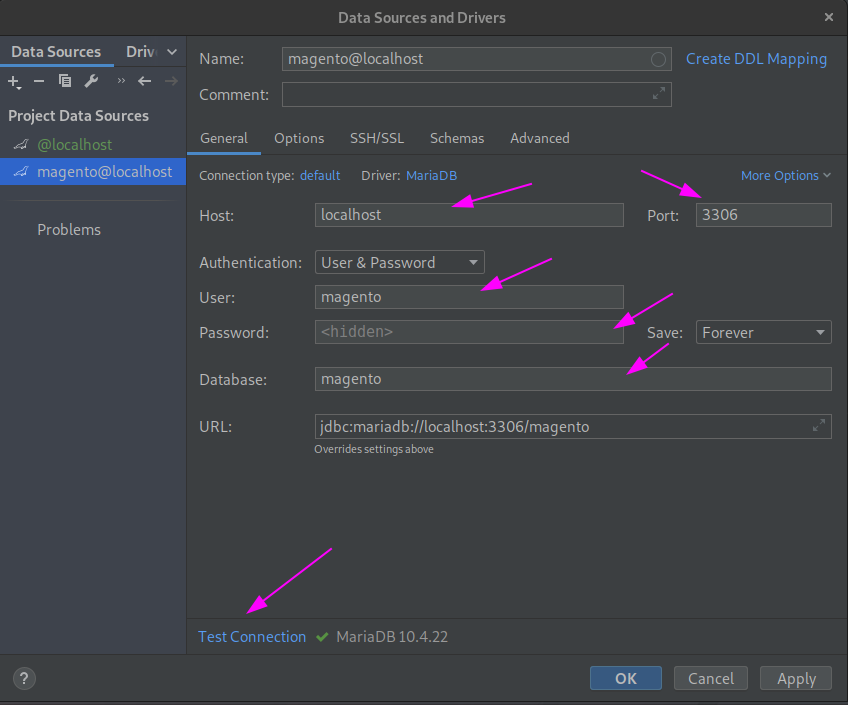
Select Data Sources, in the dialog box that opens, select MariaDB.
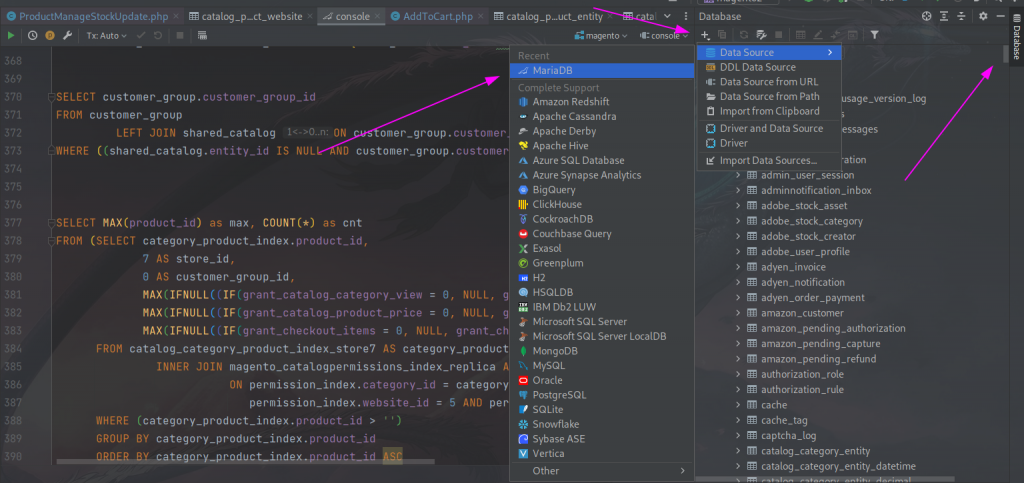
For the convenience of local development, I always specify the base, user, and password as magento.
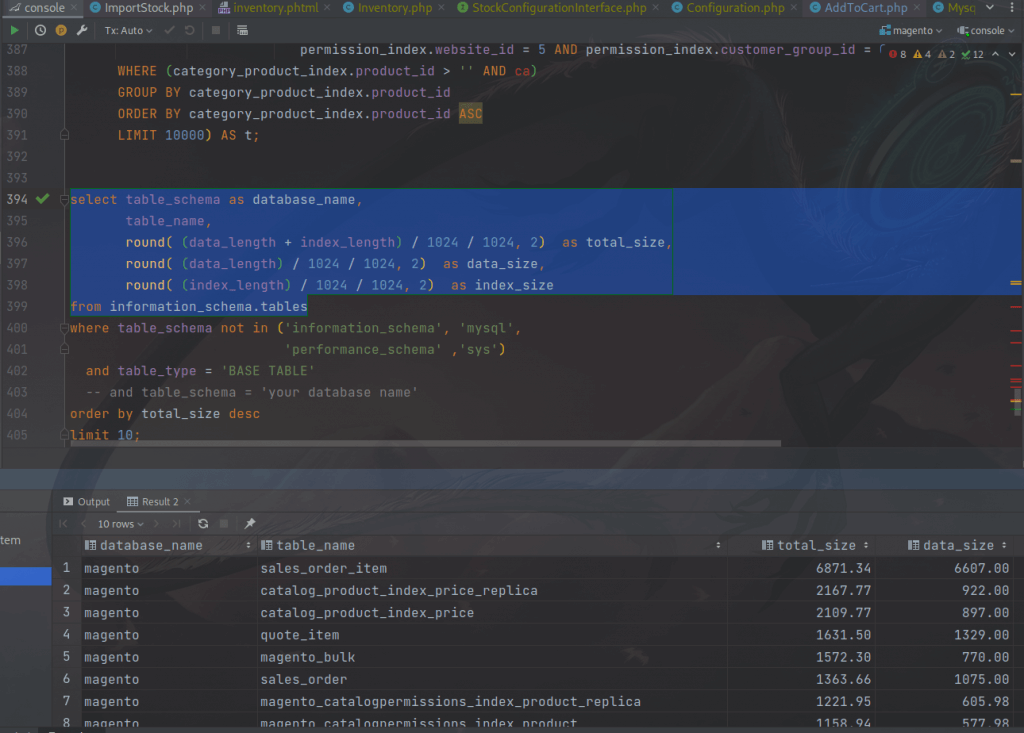
Now let’s see what advantages we can enjoy working with a database from an IDE
- Code completion and highlighting
- Executing a query in parts
- Convenient GUI for viewing and changing data
- Ability to export and import data at a time
- View the history of executed requests
Also in PhpStorm you can create diagrams.
File | Settings | Tools | Diagrams
Follow the link to learn more about DB tools settings
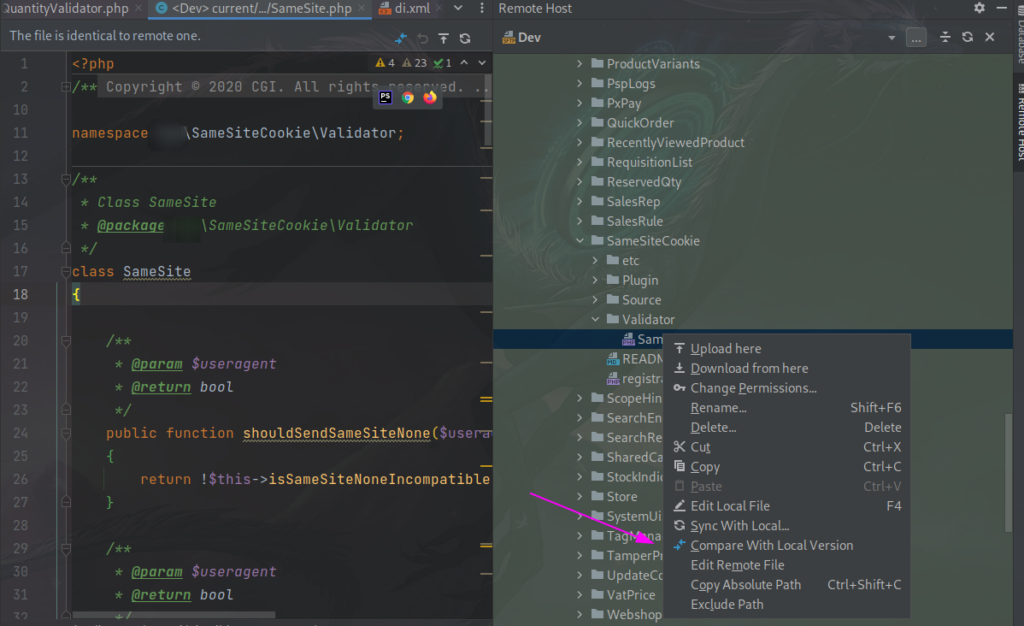
Work with the remote codebase
Since we are working not only with the local environment, we will set up our IDE to work on a remote server.
File | Settings | Build, Execution, Deployment | Deployment
Click on the “+” icon and create a new SFTP connection.
Specify SSH settings when clicking on the “…” button
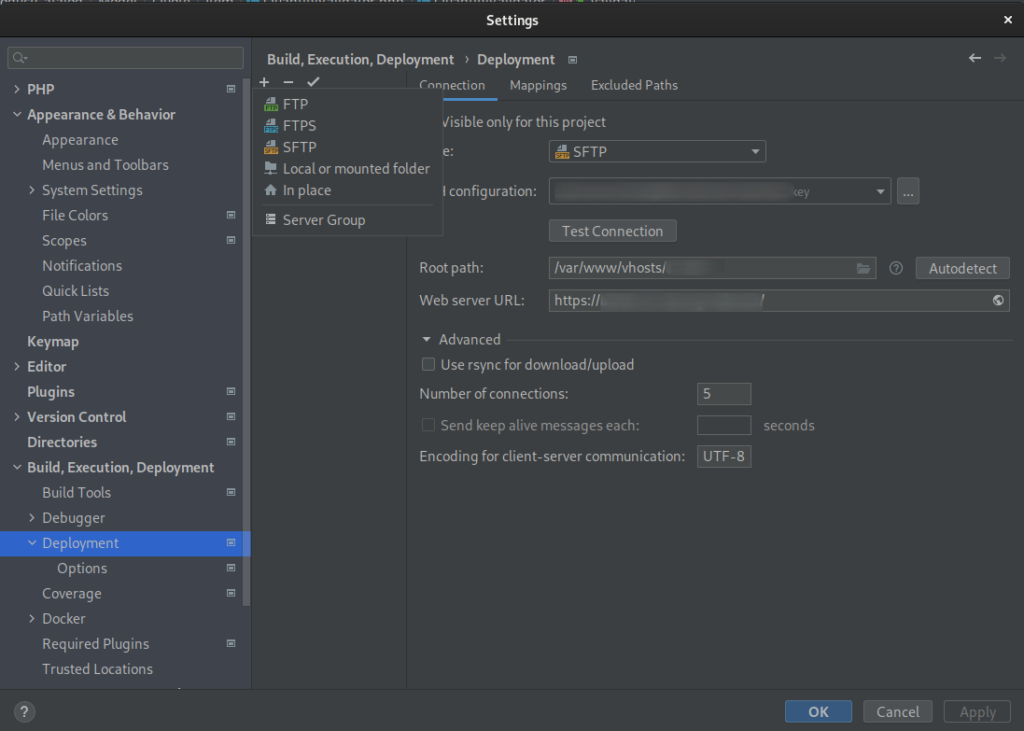
Then rt up Mappings and Excluded Paths
Mappings – Setting up paths to map data between a local project and a remote server.
Excluded Paths – files and directories that you want to leave untouched. For example
config.php env.php
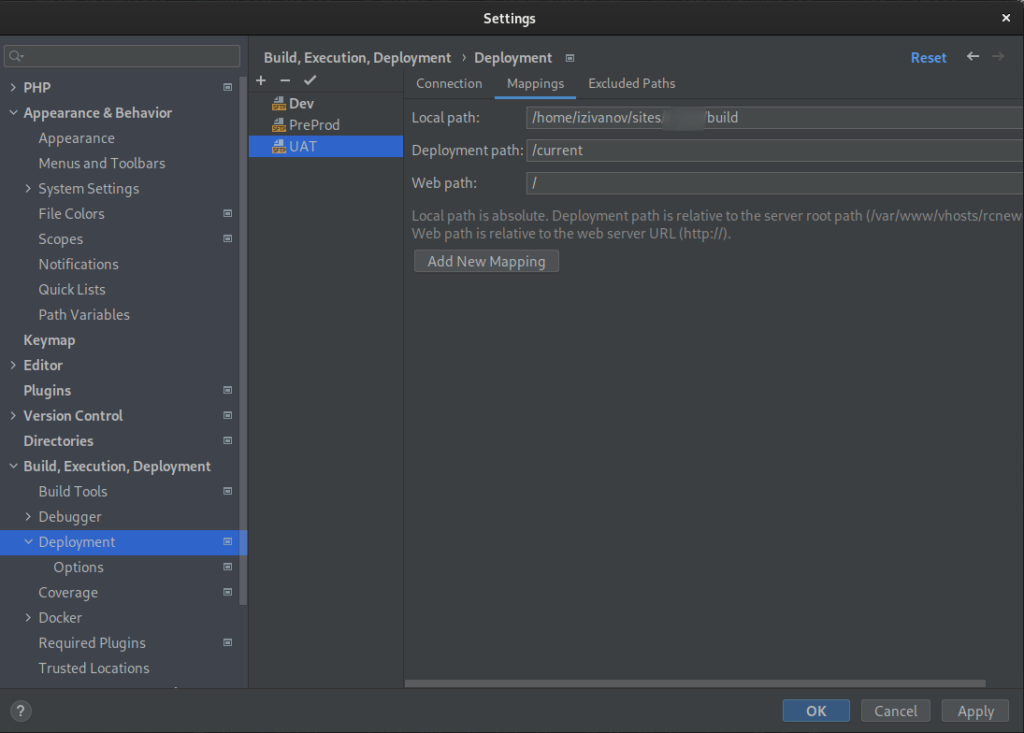
Now in PhpStorm we can view modify and sync files between the remote server and local project.
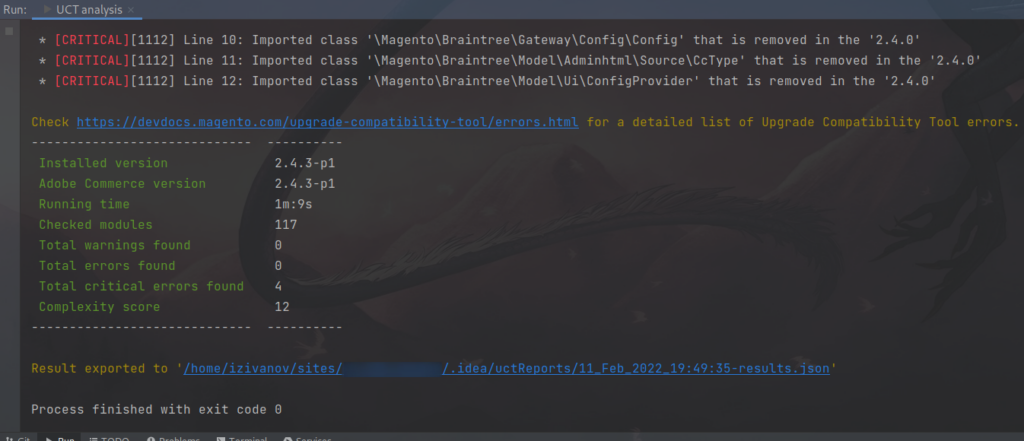
Upgrade Compatibility Tool
In order to make it easier to migrate a project to the latest version of Magento 2, many of us use Upgrade Compatibility Tool
Upgrade Compatibility Tool – This static analyzer allows you to identify all incompatibilities between the current version of the project and the one for which the upgrade is planned.
When installing Magento PhpStorm in PhpStorm, it becomes possible to manage the Upgrade Compatibility Tool in the IDE.
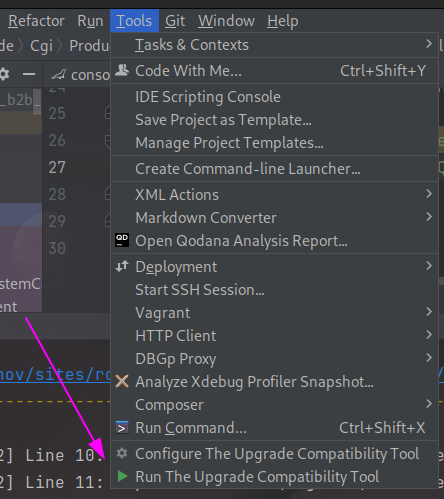
Let’s head to:
Tools | Configure The Update Compatibility Tool
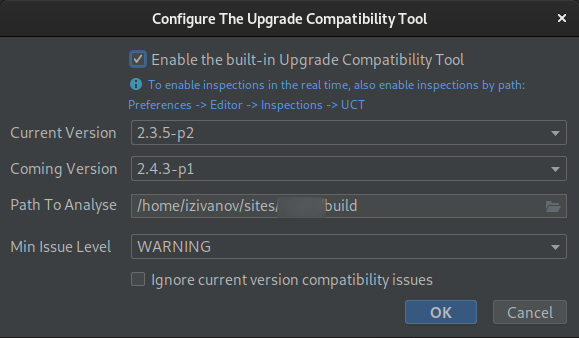
And run by clicking on Run The Update Compatibility Tool.
You can read the best practices for setting up UCT in this article.
Conclusion
From my experience with fashion eCommerce development services, PhpStorm allows you to significantly improve the quality and speed of development. It is very important for a developer to be able to fine-tune his IDE for a certain type of project and for his individual needs.
In this article, we have only reviewed the main tools in Php Storm and its configuration in the context of the Magento project, and have not yet touched on the huge number of features that it has. If you’re new to PHP and this is your first time using Jetbrains products, I would highly recommend checking out the official documentation to get started.
Explore the possibilities of your IDE, implement them in your projects, and share your best practices within the team to make our work as convenient as possible for us and of high quality for our customers ordering B2C eCommerce development services.